SpringBoot学习
前置知识
类和对象
在 Java 中,必须先设计类,才能获得对象
如何得到类的对象
类名 对象名 = new 类名();
Phone p = new Phone()
private static final
private:这是一个访问修饰符,表示该变量只能在定义它的类内部访问,其他类不能访问它。
static:这是一个类修饰符,表示该变量是类变量,而不是实例变量。它属于整个类,而不是类的某个实例(对象)。无论创建了多少个类的实例,static 变量在内存中只有一个副本。
final:这是一个修饰符,表示该变量一旦被初始化后就不能再被修改。它使变量成为常量。
把这些修饰符组合起来,private static final 表示定义了一个类级别的常量,这个常量只能在定义它的类内部使用,而且一旦赋值后就不能改变
变量名大写是 Java 中的一种编程惯例,通常用于表示常量。这样做的目的是为了让代码更易读,帮助程序员快速识别出哪些变量是常量。
在 Java 接口中,方法的前面是方法的返回类型
package com.example.UserService;
import com.example.pojo.User;
public interface UserService {
//根据用户名去查询用户
User findByUserName(String username);
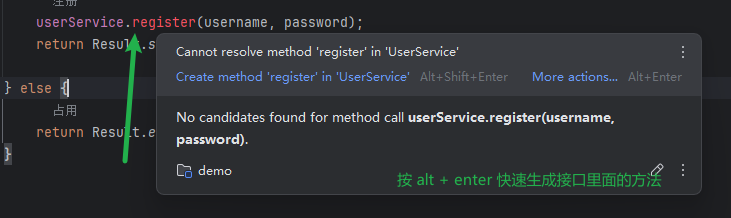
//注册
void register(String username, String password);
}
User:这是方法的返回类型。它表示 findByUserName 方法将返回一个 User 对象。如果在方法体中找到了对应的用户名,就返回一个包含用户信息的 User 对象;如果没有找到,则通常返回 null 或抛出异常。
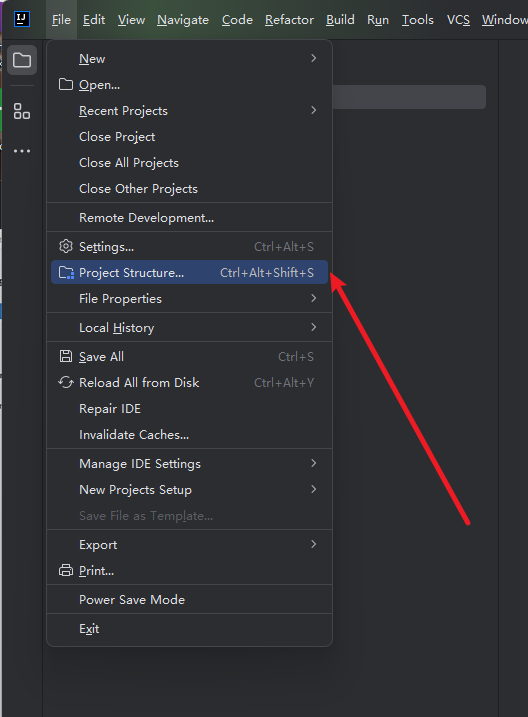
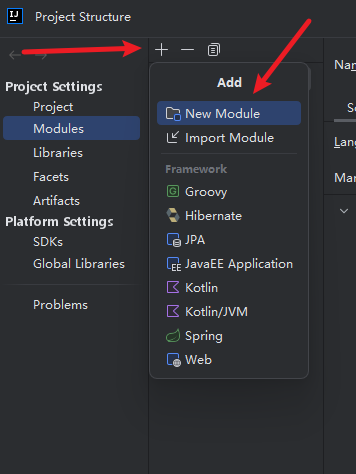
入门 使用IDEA创建项目
先创建一个新的文件夹,然后用IEDA打开
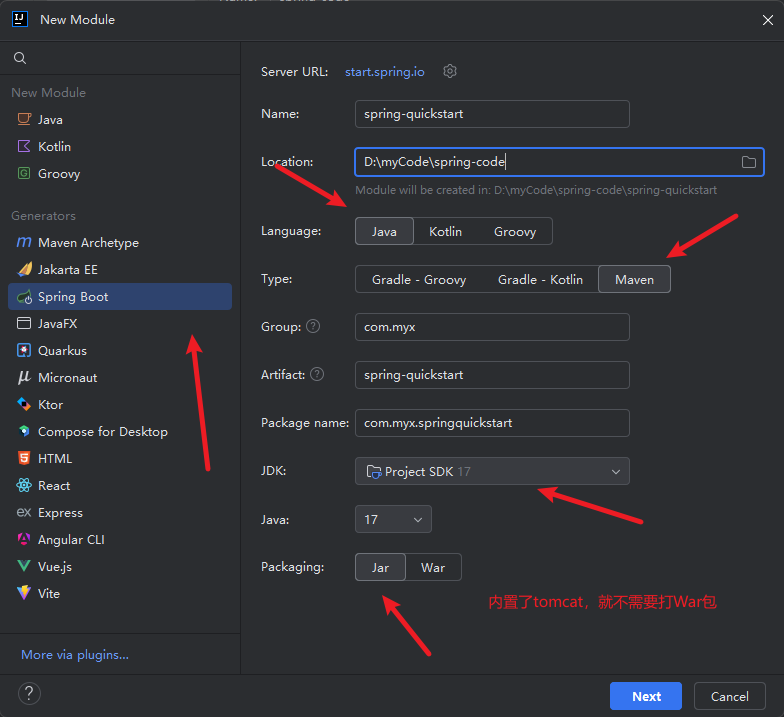
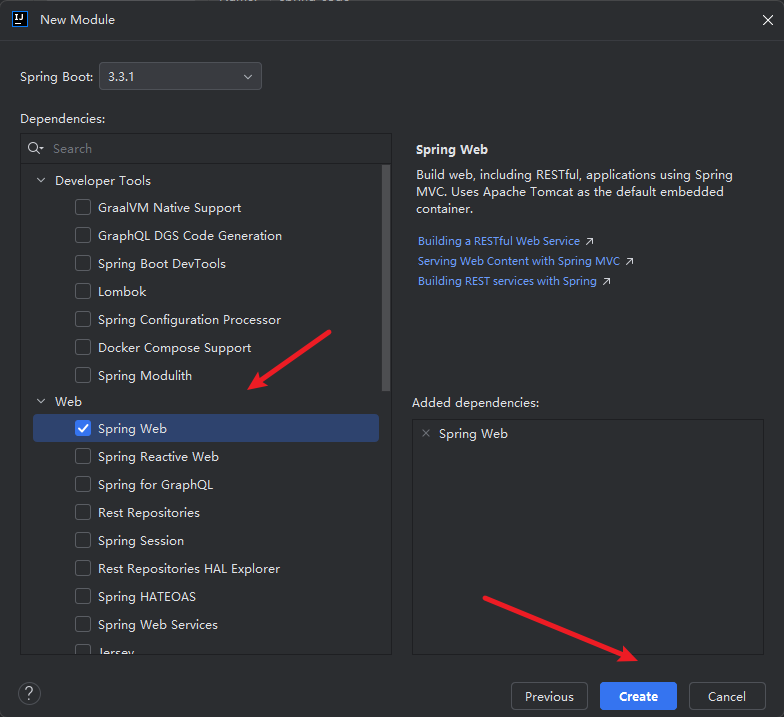
- 创建Maven工程
- 导入 spring-boot-starter-web 起步依赖
- 编写 Controller
- 提供启动类
spring-quickstart
项目的目录一定是 下面这样的,还会自动下载依赖
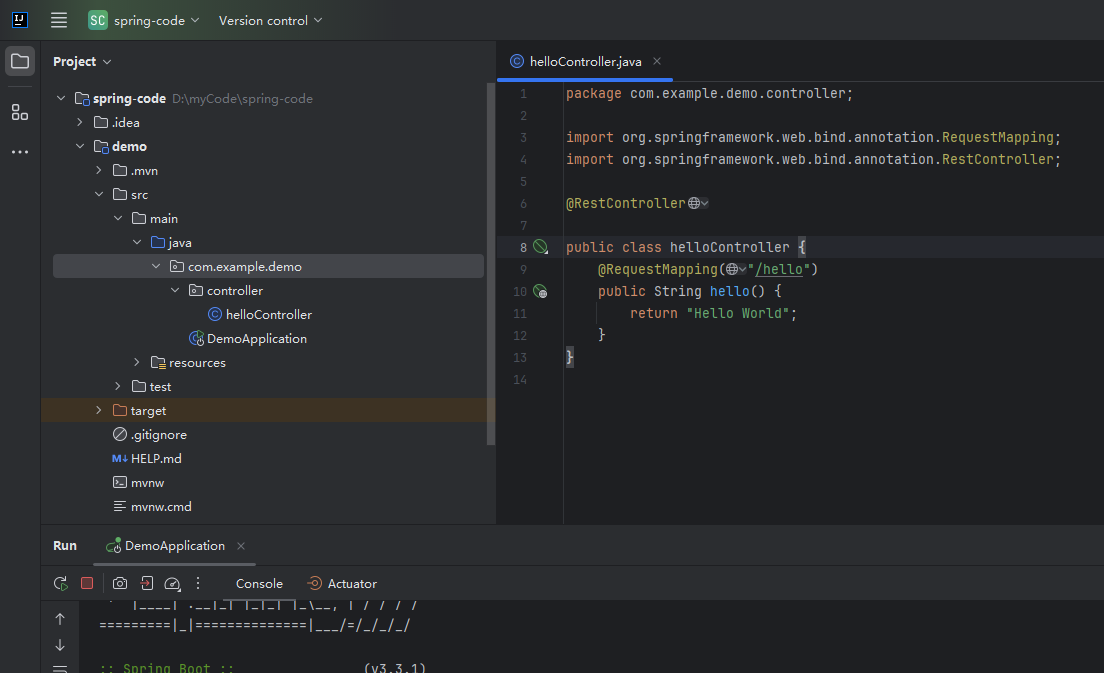
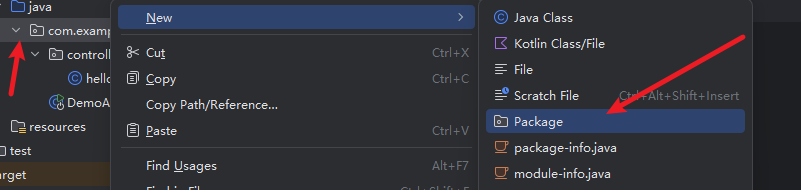
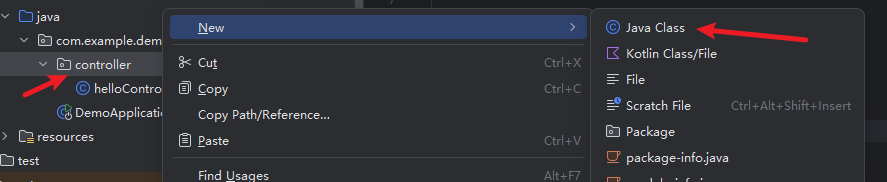
新建 controller
package com.example.demo.controller;

import org.springframework.web.bind.annotation.RequestMapping;
import org.springframework.web.bind.annotation.RestController;

@RestController

public class helloController {
    @RequestMapping("/hello")
    public String hello() {
        return "Hello World";
    }
}
浏览器 输入 http://localhost:8080/hello 就可以看到Hello World 了
配置文件
properties配置文件yaml配置文件
旧的:
https://docs.spring.io/spring-boot/how-to/properties-and-configuration.html
application.properties文件
spring.application.name=demo
server.port=9090
server.servlet.context-path=/start
使用 yaml 配置:
把 application.properties 修改为 application.properties.bak
此时 spring boot 就不再认识这个配置文件了
再到 resources目录下 新建一个application.yaml 文件
server:
  port: 9191
  servlet:
    context-path: /start
yml 配置信息书写和获取
Spring Boot 整合 mybatis
mysql 下载地址
https://dev.mysql.com/downloads/windows/installer/8.0.html
https://downloads.mysql.com/archives/community/
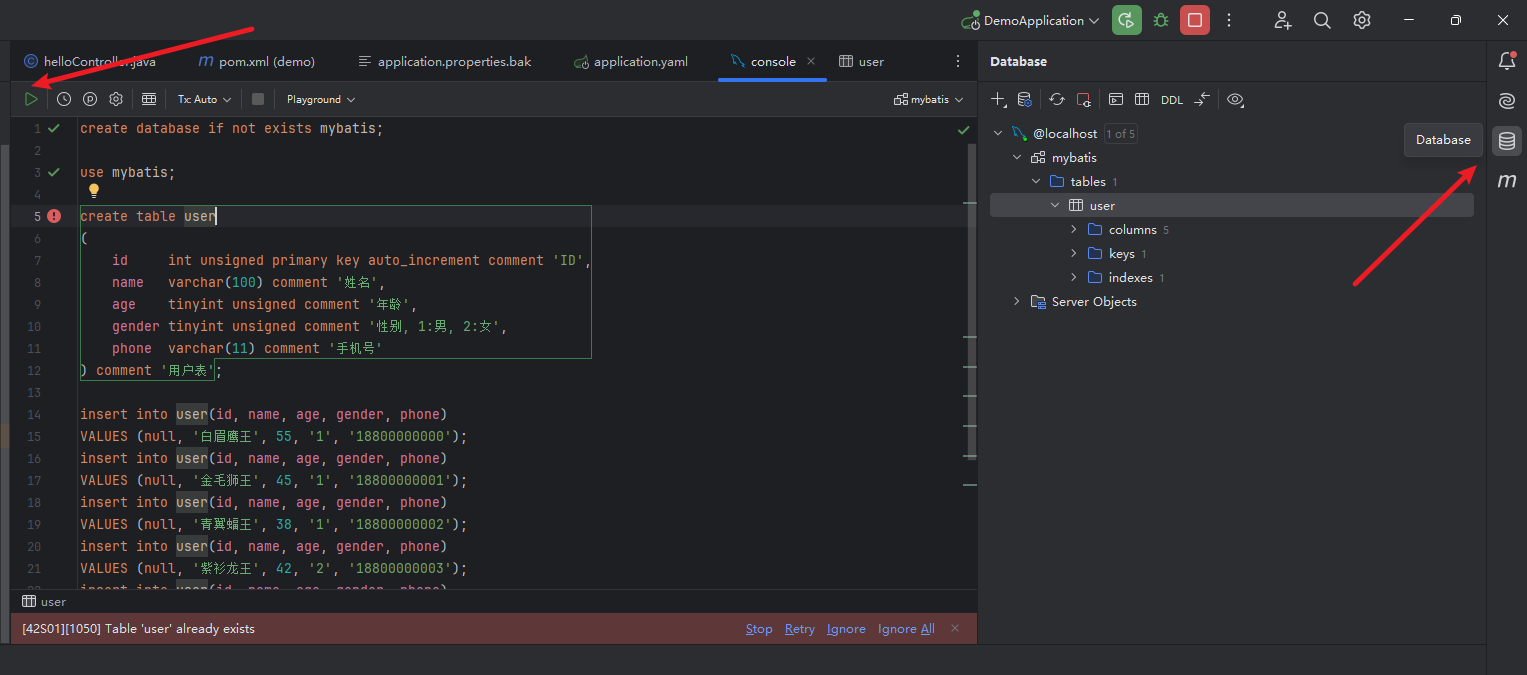
执行下面的 sql 文件
使用 IDEA 自带工具 或者 navicat
create database if not exists mybatis;
use mybatis;
create table user
(
id int unsigned primary key auto_increment comment 'ID',
name varchar(100) comment '姓名',
age tinyint unsigned comment '年龄',
gender tinyint unsigned comment '性别, 1:男, 2:女',
phone varchar(11) comment '手机号'
) comment '用户表';
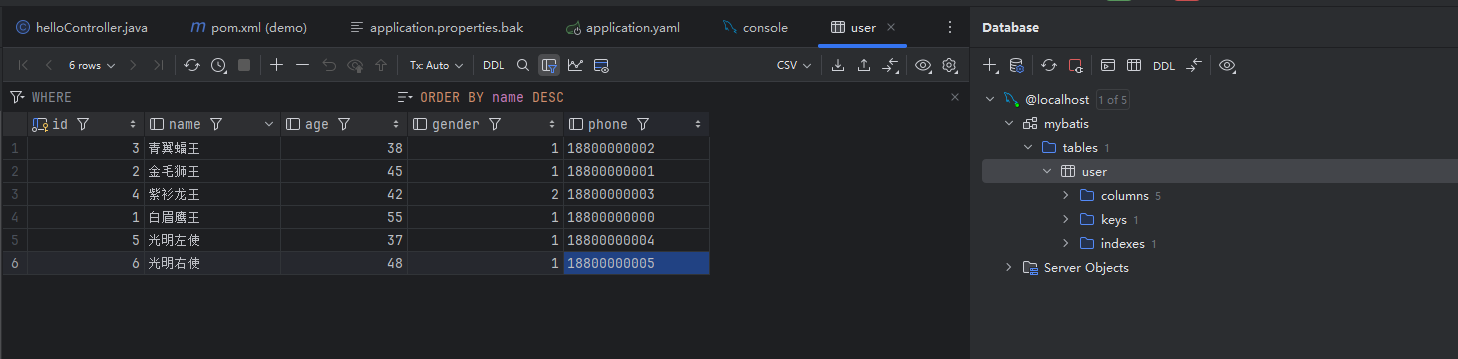
insert into user(id, name, age, gender, phone)
VALUES (null, '白眉鹰王', 55, '1', '18800000000');
insert into user(id, name, age, gender, phone)
VALUES (null, '金毛狮王', 45, '1', '18800000001');
insert into user(id, name, age, gender, phone)
VALUES (null, '青翼蝠王', 38, '1', '18800000002');
insert into user(id, name, age, gender, phone)
VALUES (null, '紫衫龙王', 42, '2', '18800000003');
insert into user(id, name, age, gender, phone)
VALUES (null, '光明左使', 37, '1', '18800000004');
insert into user(id, name, age, gender, phone)
VALUES (null, '光明右使', 48, '1', '18800000005');
pom.xml
<!--    mysql驱动依赖    -->
        <dependency>
            <groupId>com.mysql</groupId>
            <artifactId>mysql-connector-j</artifactId>
        </dependency>
        <!--    mybatis的起步依赖    -->
        <dependency>
            <groupId>org.mybatis.spring.boot</groupId>
            <artifactId>mybatis-spring-boot-starter</artifactId>
            <version>3.0.0</version>
        </dependency>
添加后之后需要使用 Maven 更新下载这个依赖
接下来去完成数据源信息的配置
application.yaml
mybatis使用注解完成增删改查
- 查询:
@Select - 添加:
@Insert - 修改:
@Update - 删除:
@Delete
提示:
注解完成简单功能。
配置文件完成复杂功能。
IEDA去掉sql语句黄色警告
SQL dialect is not configured. MySQL, BigQuery, MariaDB match best
https://blog.csdn.net/weixin_45309636/article/details/108740212
IDEA出现Unable to resolve column
https://blog.csdn.net/weixin_39940206/article/details/107520871
pojo
在 Java 项目中,pojo(Plain Old Java Object)通常用来定义类型和数据模型
UserController
UserController 是控制层,负责处理用户请求并将结果返回给前端。通常使用 @RestController 注解。
UserService
UserService 是服务层,包含业务逻辑。通常使用 @Service 注解。
UserMapper
UserMapper 是数据访问层,使用 MyBatis 进行数据库操作。通常使用 @Mapper 注解或者在 mapper 包中自动扫描。
通常,开发流程从数据访问层 (UserMapper) 开始,然后是业务逻辑层 (UserService),最后是控制层 (UserController)。
注册接口
UserController
@PostMapping("/register")
public返回价类型register(String username, String password){
    //用户名是否已被占用
    //注册
}
UserService
//根据用户名查询用户
public User findByUsername(String username) {
//注册
public vold register(String username,String password) {
}
UserMapper
-查询
select * from user where username=?;
-插入
insert into user(username,password,create time,update time) values (?,?,?,?);
原理解释:MyBatis自动映射
让我们深入了解一下 MyBatis 如何处理查询结果,并将其自动映射到 User 对象中。
查询结果
假设 user 表中有以下数据:
| id | username | password | create_time | update_time |
|---|---|---|---|---|
| 1 | john_doe | secret | 2023-07-10 10:00:00 | 2023-07-10 10:00:00 |
| 2 | jane_smith | password | 2023-07-10 11:00:00 | 2023-07-10 11:00:00 |
SQL 查询
当你调用 findByUserName("john_doe") 方法时,MyBatis 会执行如下的 SQL 查询:
sql
复制代码
SELECT * FROM user WHERE username = 'john_doe';
这个查询会从 user 表中找到 username 为 john_doe 的记录,并返回如下结果:
| id | username | password | create_time | update_time |
|---|---|---|---|---|
| 1 | john_doe | secret | 2023-07-10 10:00:00 | 2023-07-10 10:00:00 |
自动映射
MyBatis 会将上述查询结果的每一列映射到 User 类的相应字段中。假设你的 User 类定义如下:
java复制代码package com.example.pojo;

public class User {
    private int id;
    private String username;
    private String password;
    private Timestamp createTime;
    private Timestamp updateTime;

    // getters and setters
}
MyBatis 的映射过程如下:
- 字段匹配:MyBatis 会根据列名和
User类的字段名进行匹配。比如,查询结果中的id列会映射到User类的id字段,username列会映射到User类的username字段,以此类推。 - 对象创建:MyBatis 会创建一个新的
User对象。 - 设置值:MyBatis 会将查询结果中的值设置到
User对象的相应字段中。例如,将id列的值1设置到User对象的id字段,将username列的值john_doe设置到User对象的username字段,等等。
最后,findByUserName 方法返回这个填充了数据的 User 对象。
关于打印
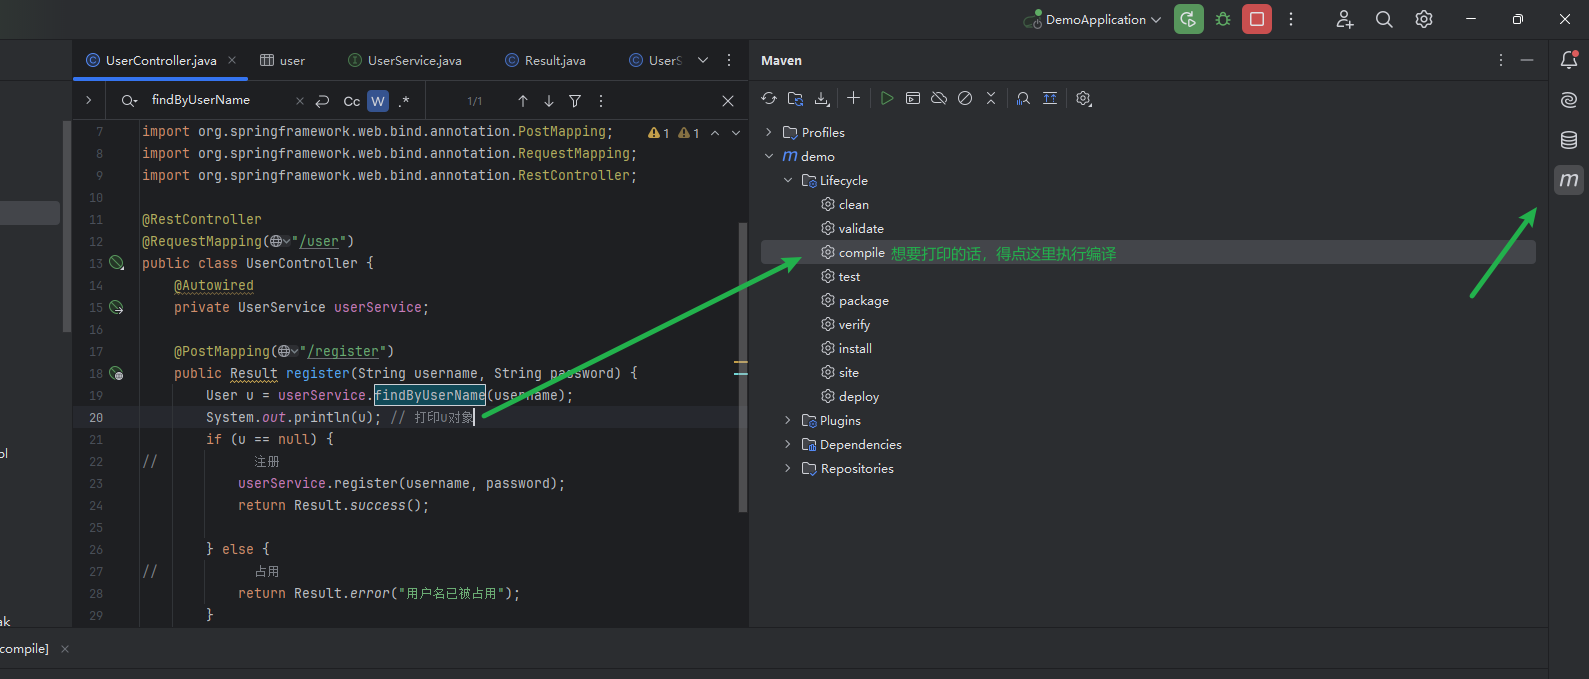
lombok
@Data
@NoArgsConstructor:生成一个无参构造函数。
@AllArgsConstructor:生成一个包含所有字段的构造函数。
@Data:生成 getter、setter、toString、equals 和 hashCode 方法。
Spring Validation 校验
Spring 提供的一个参数校验框架,使用预定义的注解完成参数校验
- 引入Spring Validation 起步依赖
- 在参数前面添加@Pattern注解
- 在Controller类上添加@Validated注解
全局异常处理器
处理参数检验失败的异常
package com.example.exception;

import com.example.pojo.Result;
import org.springframework.util.StringUtils;
import org.springframework.web.bind.annotation.ExceptionHandler;
import org.springframework.web.bind.annotation.RestControllerAdvice;

@RestControllerAdvice
public class GlobalExceptionHandler {
    @ExceptionHandler(Exception.class)
    public Result handleException(Exception e) {
        e.printStackTrace();
        return Result.error(StringUtils.hasLength(e.getMessage()) ? e.getMessage() : "操作失败");
    }
}
JWT
JSON Web Token
定义了一种简洁的、自包含的格式,用于通信双方以ison数据格式安全的传输信息。
组成:
- 第一部分:Header(头),记录令牌类型、签名算法等。例如:
{"alg":"HS256","type":"JWT”} - 第二部分:Payioad(有效载荷),携带一些自定义信息、认信息等。例如:
("id":"1",username":"Tom") - 第三部分:Signature(签名),防止Token被篡改、确保安全性,将header、payload,并加入指定秘钥,通过指定签名算法计算而来,

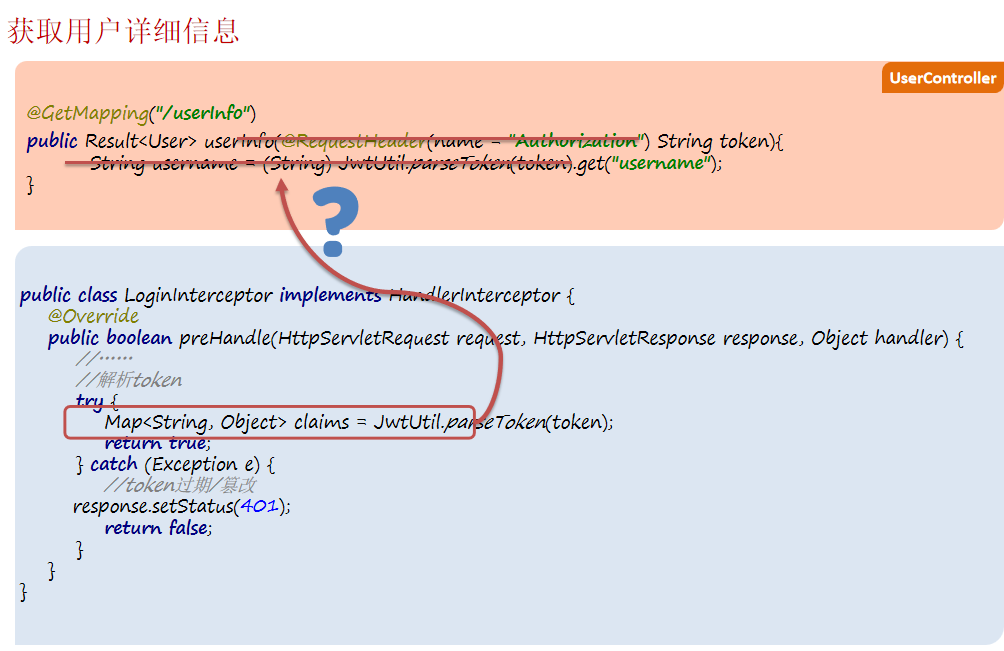
拦截器统一令牌校验
package com.example.controller;

import com.example.pojo.Result;
import com.example.utils.JwtUtil;
import jakarta.servlet.http.HttpServletResponse;
import org.springframework.web.bind.annotation.GetMapping;
import org.springframework.web.bind.annotation.RequestHeader;
import org.springframework.web.bind.annotation.RequestMapping;
import org.springframework.web.bind.annotation.RestController;

import java.util.Map;

@RestController
@RequestMapping("/article")
public class ArticleController {
    @GetMapping("/list")
//    @RequestHeader 获取请求头
    public Result<String> list(@RequestHeader(name = "Authorization") String token, HttpServletResponse response) {
        try {
            Map<String, Object> claims = JwtUtil.parseToken(token);
            System.out.println("claims" + claims);
            return Result.success("所有的文章数据");

        } catch (Exception e) {
//            设置http响应状态码为401
            response.setStatus(401);
            return Result.error("未登录");
        }
    }

}
上面这样 就需要在每个接口里面写,麻烦 换成下面统一拦截

postman统一添加请求头

ThreadLocal 优化 userInfo 接口
ThreadLocal :提供线程局部变量
- 用来存取数据: set()/get()
- 使用ThreadLocal存储的数据, 线程安全
分组校验
把校验项进行归类分组,在完成不同的功能的时候,校验指定组中的校验项
- 定义分组
- 定义校验项时指定归属的分组
- 校验时指定要校验的分组
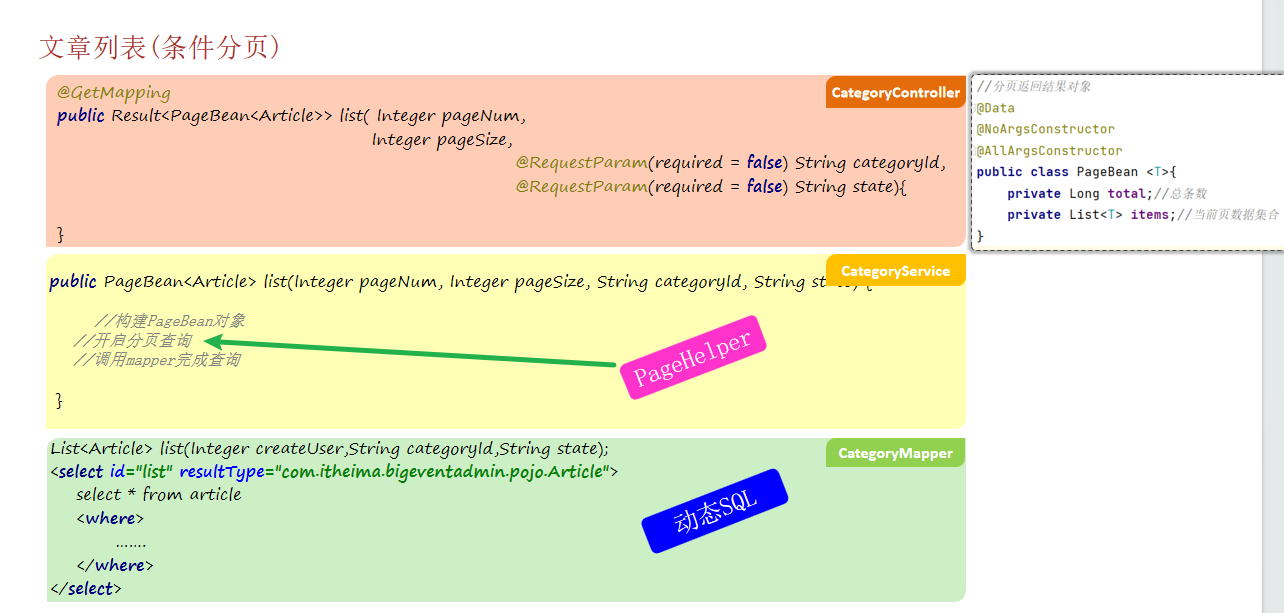
文章分页查询
文件上传_本地存储
前端三要素:
- post
- enctype="multipart/form-data"
- type="file"
<form action="/upload" method="post" enctype="multipart/form-data">
    头像: <input type="file" name="image"><br>
    <input type="submit" value="提交">
</form>
后端:
- String
getOriginalFilename(); //获取原始文件名 - void
transferTo(File dest); //将接收的文件转存到磁盘文件中 - long
getSize(); //获取文件的大小,单位:字节 - byte[]
getBytes(); //获取文件内容的字节数组 - InputStream
getInputStream(); //获取接收到的文件内容的输入流
@RestController
public class FileUploadController {
    @PostMapping("/upload")
    public Result<String> upload(MultipartFile file) throws IOException {
        //把文件的内容存储到本地磁盘
        String originalFilename = file.getOriginalFilename();
        //使用UUID 保证文件的名字是唯一的,从而防止文件覆盖
        String fileName = UUID.randomUUID().toString() + originalFilename.substring(originalFilename.lastIndexOf("."));
        file.transferTo(new File("C:\\Users\\cat20\\Desktop\\bigEventFiles\\" + fileName));
        return Result.success("url访问地址....");

    }
}
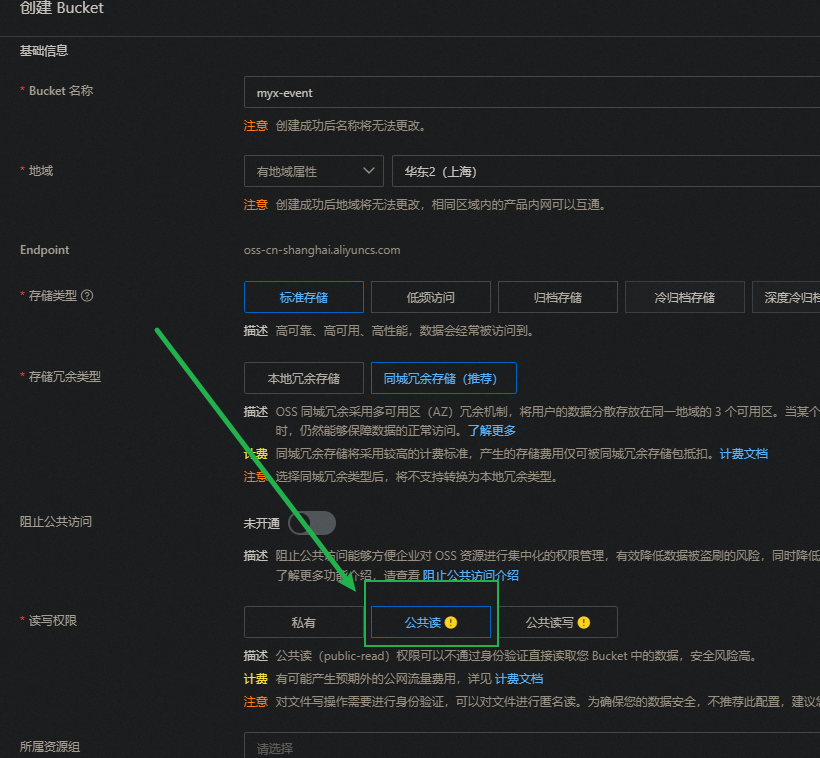
文件上传_阿里云OSS存储
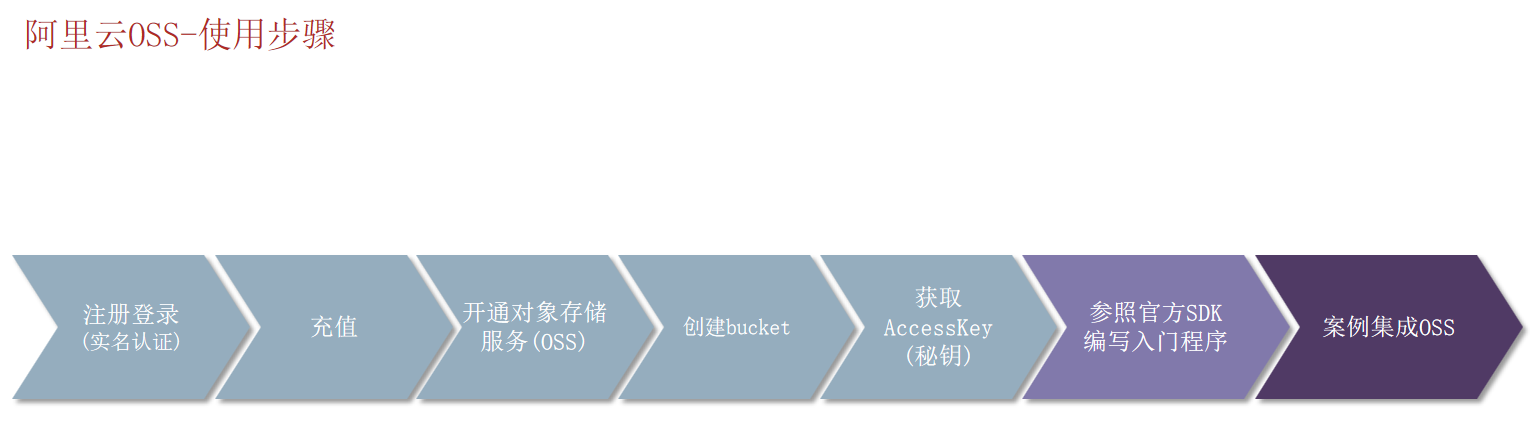
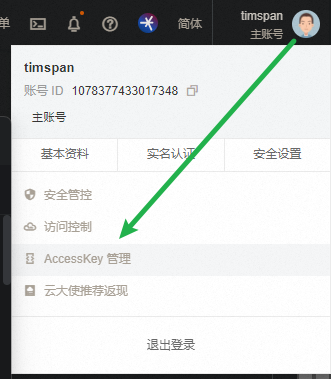
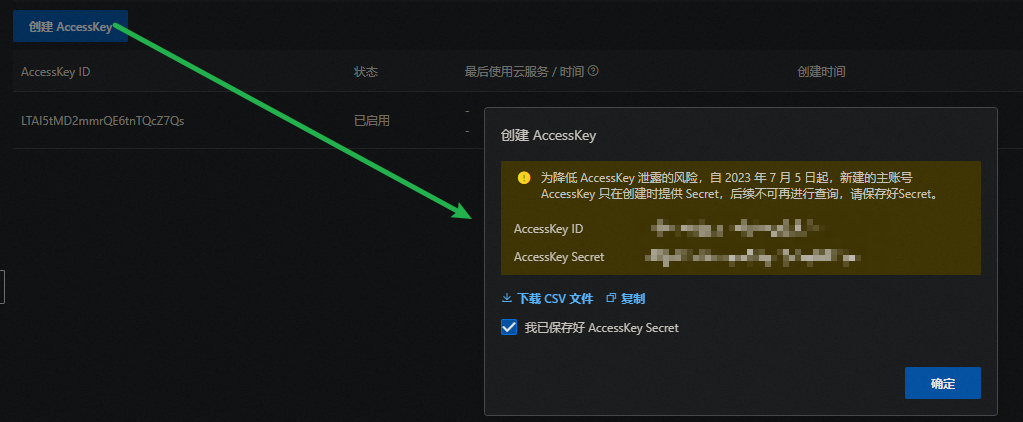
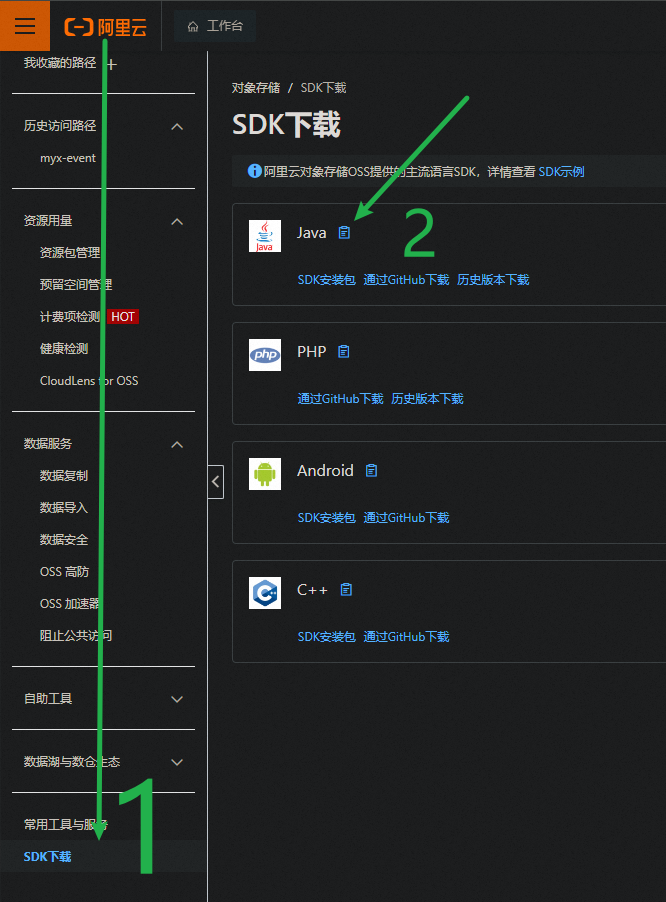
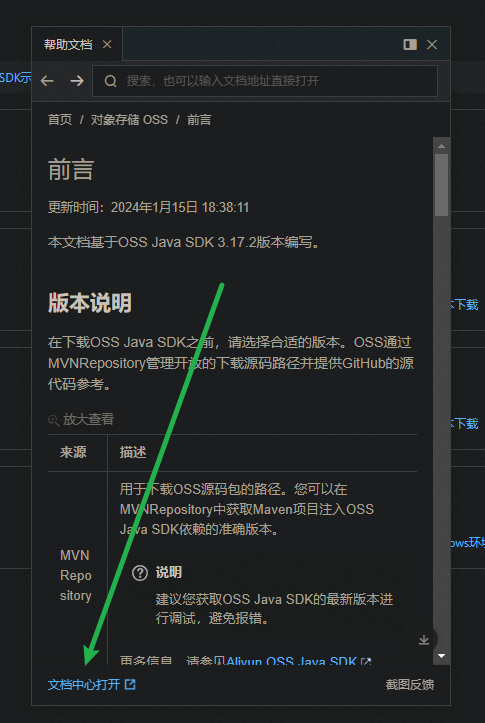
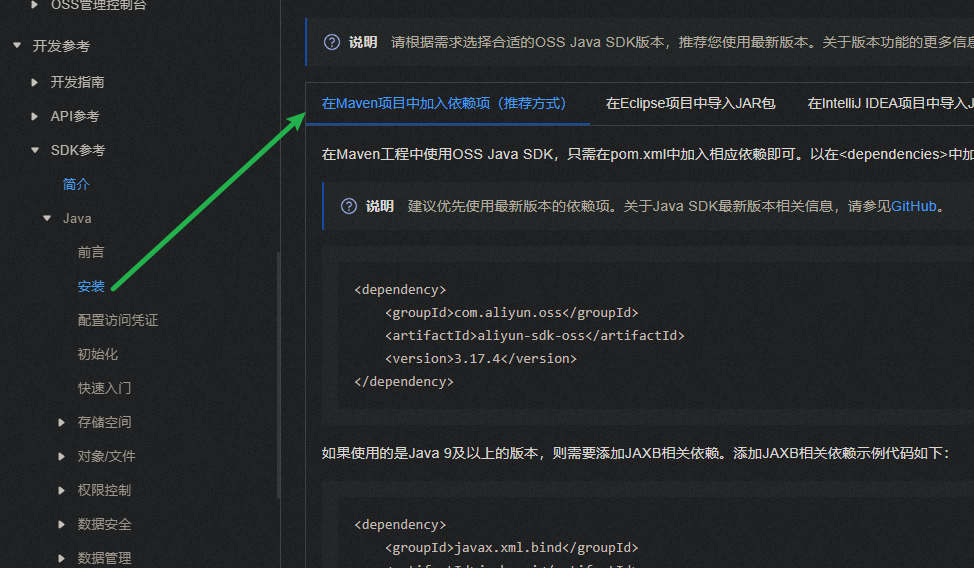
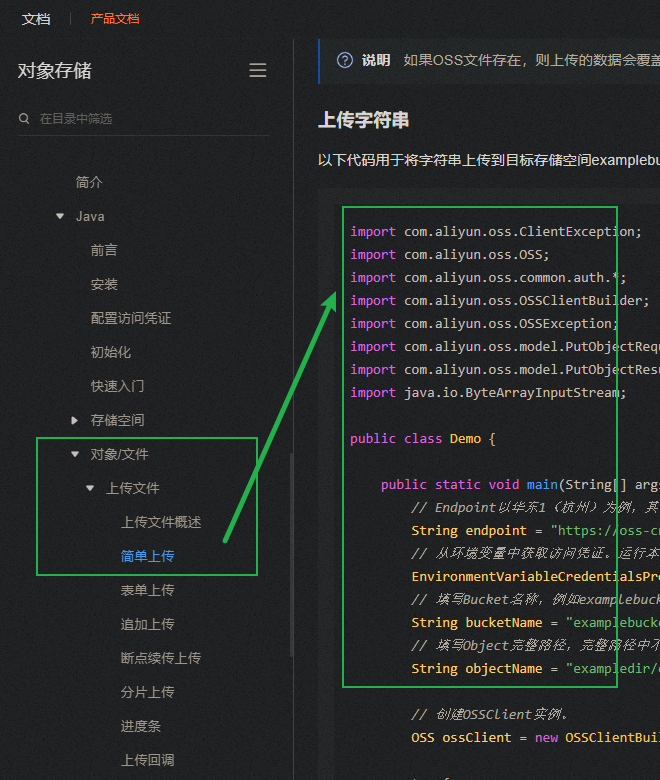
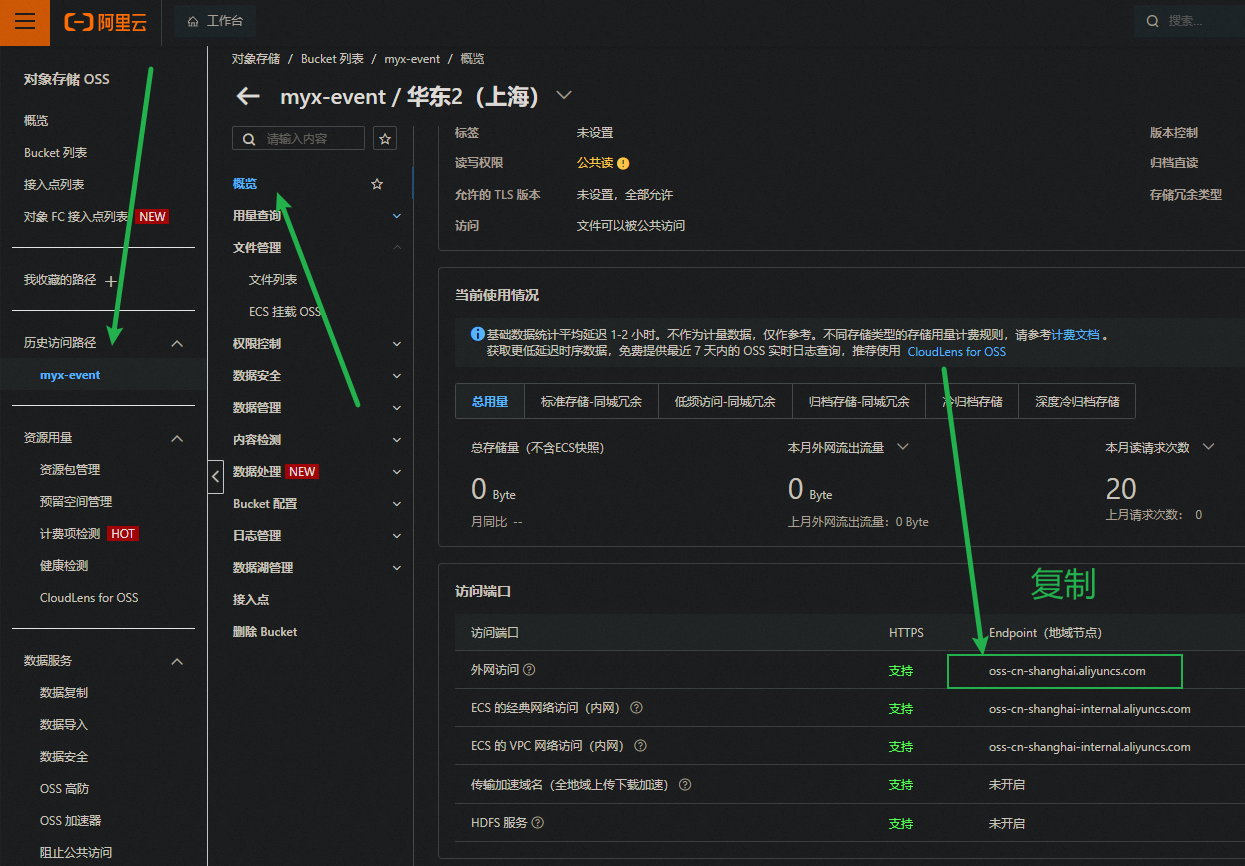
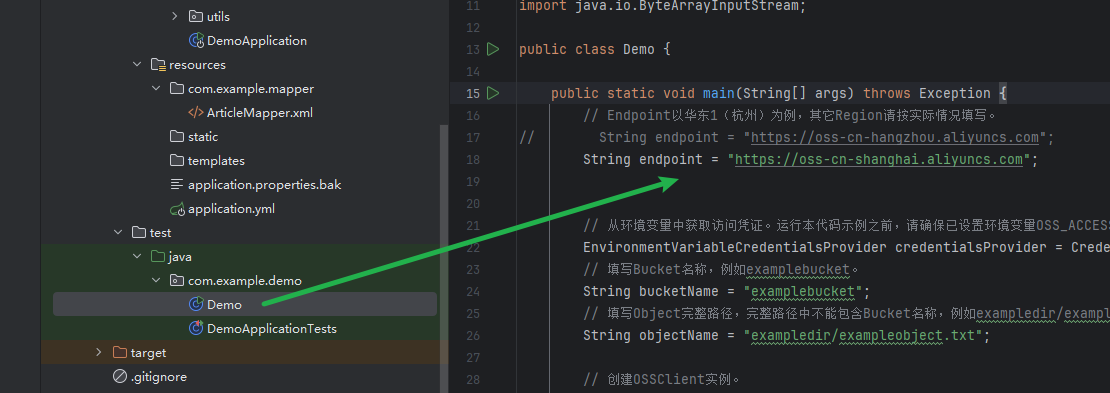
代码见源码
优化登录_redis主动失效
令牌主动失效机制
- 登录成功后,给浏览器响应令牌的同时,把该令牌
存储到redis中 - LoginInterceptor拦截器中,需要验证浏览器携带的令牌,并同时需要获取到redis中存储的与之相同的令牌
- 当用户修改密码成功后,删除redis中存储的旧令牌
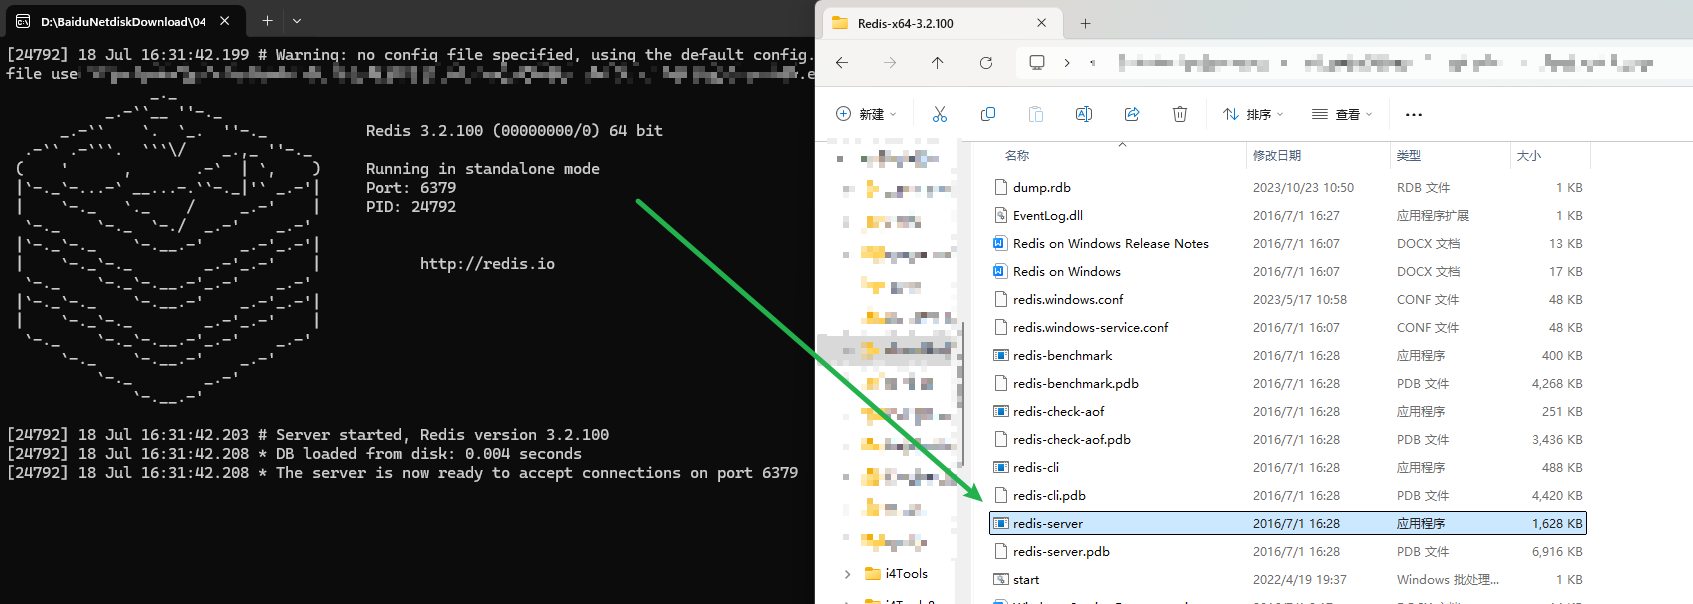
SpringBoot集成redis
- 导入
spring-boot-starter-data-redis起步依赖 - 在yml配置文件中,配置redis连接信息
- 调用APl(StringRedisTemplate)完成字符串的存取操作
StringRedisTemplate 使用前需要先通过注解注入到IOC容器中
项目打包
            <plugin>
                <groupId>org.springframework.boot</groupId>
                <artifactId>spring-boot-maven-plugin</artifactId>
                <version>3.0.2</version>
                <executions>
                    <execution>
                        <goals>
                            <goal>repackage</goal>
                        </goals>
                    </execution>
                </executions>
            </plugin>

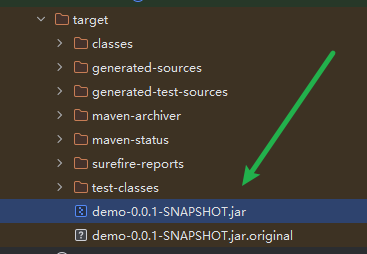
build 成功后的 jar 包位置
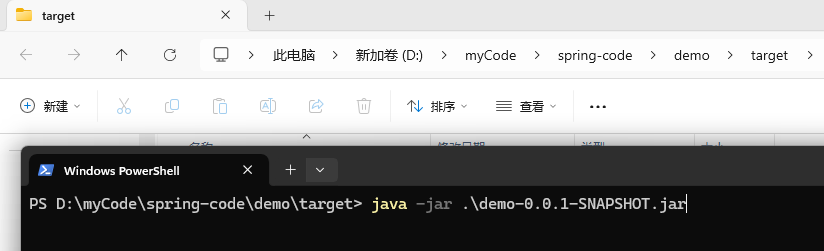
输入 java -jar 再按 tab 键盘 自动补齐
java -jar .\demo-0.0.1-SNAPSHOT.jar
运行成功后在8080端口
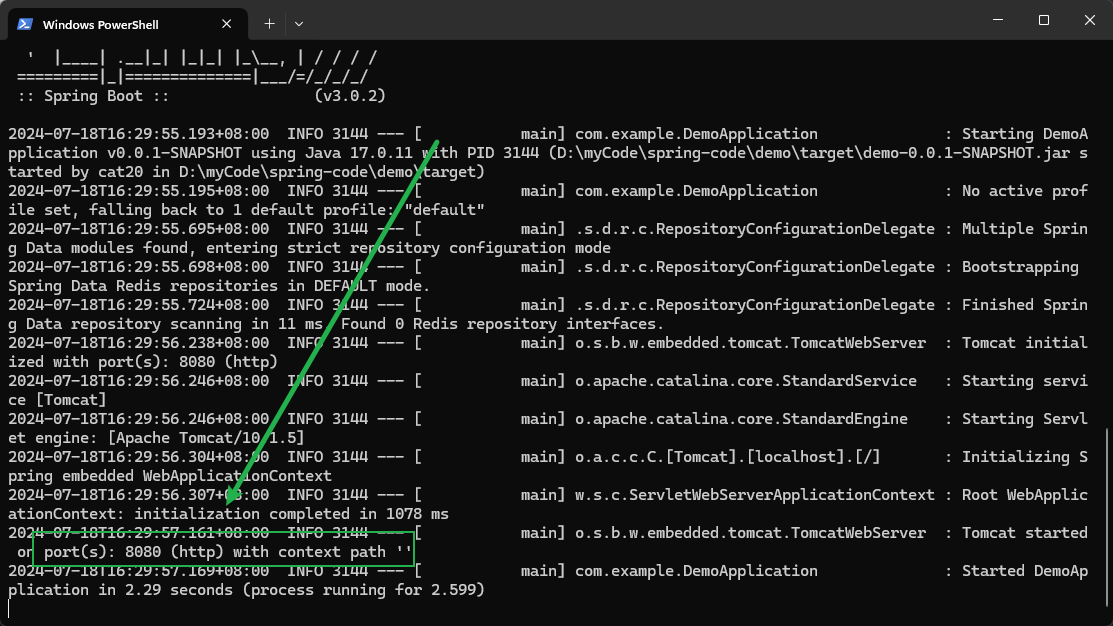
注意:需要启动 redis 服务